If you’re looking to manage your Morse mainnet account for the Pocket Network and prepare for migration, the Soothe Vault Chrome extension provides a streamlined way to import your wallet. This guide will walk you through each step of the process.
Step 1: Visit the Soothe Website and Download the Extension
First, open your Chrome browser and navigate to the official Soothe website at https://trustsoothe.io/. On the homepage, you’ll find a link or button labeled “Download Soothe Vault”. Clicking this will take you directly to the Soothe Vault page on the Chrome Web Store.

Step 2: Add Soothe Vault to Chrome
On the Chrome Web Store page, click the “Add to Chrome” button. A confirmation pop-up will appear; click “Add extension” to proceed. Once the extension has been successfully installed, you should be automatically redirected back to the Soothe website (https://trustsoothe.io/).

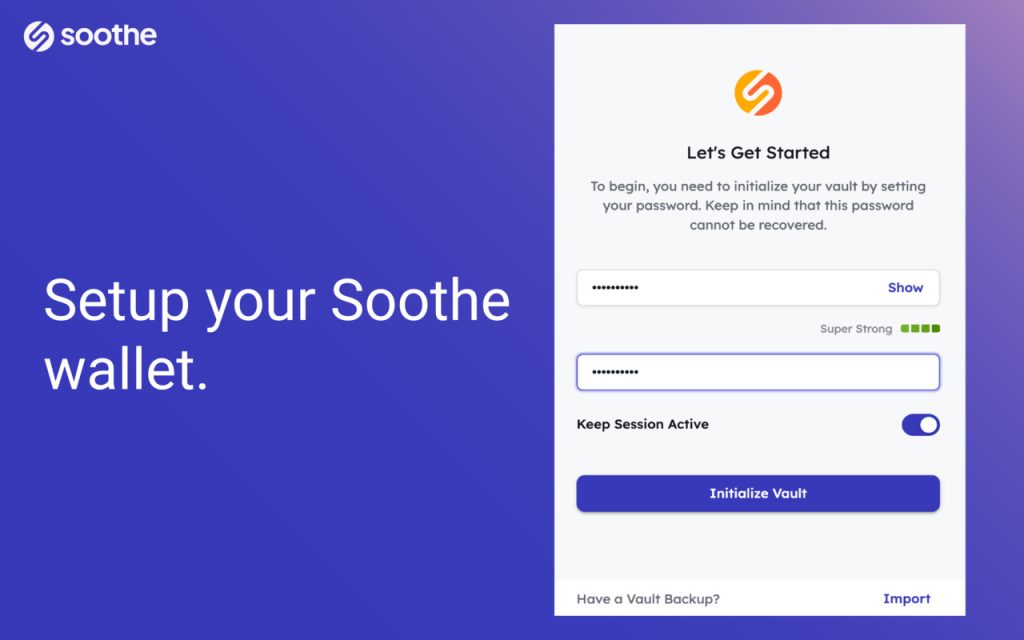
Step 3: Begin the Setup and Initialize Your Vault
Back on the Soothe website, click on the “Let’s Get Started” button to begin setting up your new vault (or just click the browser extension icon). You will then be prompted to create a password for your Soothe Vault. Important: This password is critical for accessing your imported accounts and cannot be recovered if you forget it. Ensure you choose a strong password and store it in a very safe and secure location.

Step 4: Import Your Morse Pocket Wallet
Now it’s time to import your existing Morse wallet. Within the Soothe Vault interface, look towards the top left corner for the POKT logo. Click on it and make sure that “Pocket (Morse Mainnet)” is the selected network. This ensures you’re importing the correct type of account. After confirming the network selection, click the “Import” button.

Step 5: Complete the Wallet Import Process
Next, you’ll need to provide a name for the wallet you’re importing; this is for your reference and helps you identify it easily within Soothe Vault. Then, carefully paste your private key into the field provided. Double-check that you’ve pasted the correct key, and then click “Import”.

Note: You may also use the json keyfile and password method by selecting “Portable Wallet File”. This will open the wallet view full screen to allow for a file import.
Step 6: View Your Imported Wallet and Prepare for Migration

If the import was successful, you will see a screen displaying your Morse wallet address and its current balance. Review this information and then click “Done”. With your wallet imported, you’re now prepared for the Shannon migration.
Click the “Migrate” button within Soothe Vault to explore the migration process to Shannon. This will NOT work until after the Shannon upgrade is completed.
Step 7: Create a new Shannon compatible account
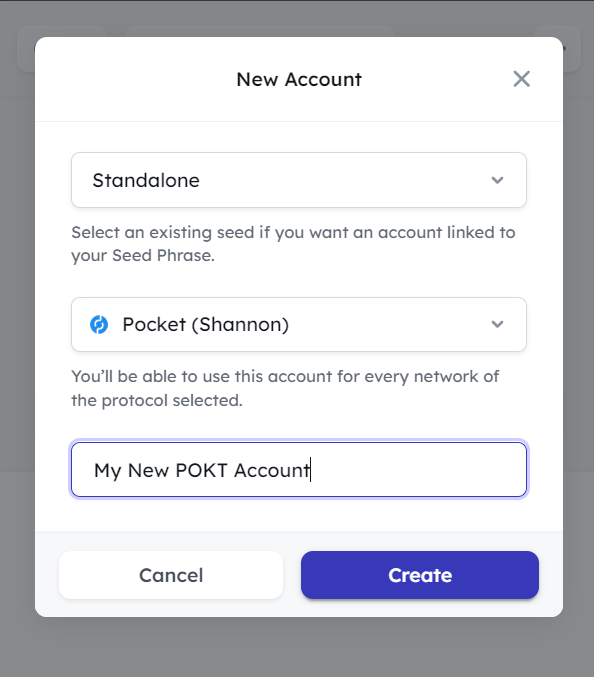
Using the three dots in the upper right hand corner, select “New Account” and create a Standalone account on the Pocket (Shannon) version of the network. Give it a name you will remember, and click “Create”.
IMPORTANT: You should always store your private key somewhere safely when creating a new wallet. If you lose your private key, you lose access to the wallet. Additionally, you may backup your entire Soothe vault in a downloadable file. Use the additional options (the three dots) to backup both your private key and Soothe Vault.
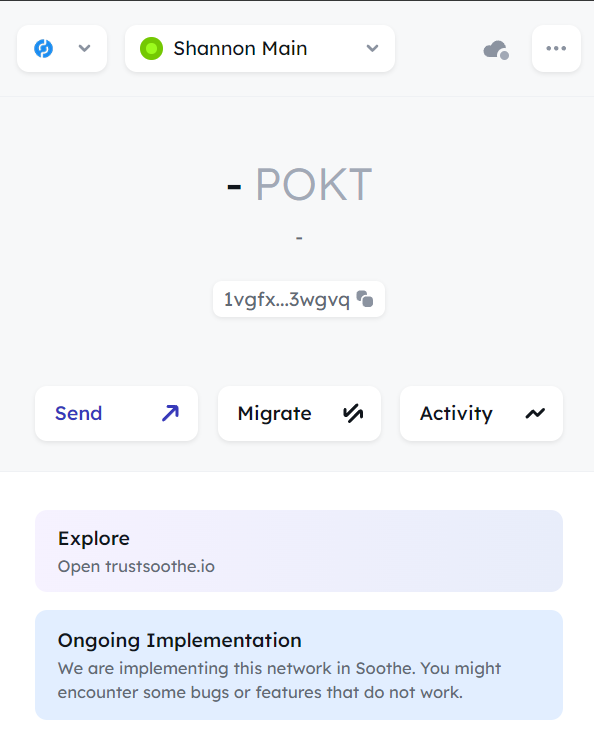
Your Shannon wallet is now ready, but it does not exist on the network until has a balance or transaction history:
Step 8: Instantiate your wallet by minting a MACT token
MACT stands for “Morse Account Claim Token”. It is a simple token that only exists to tell the network that your wallet is alive and ready on the network. It has no monetary value, and cannot be used for any other purpose than to bring your Shannon wallet to life so that your Morse account may be claimed.
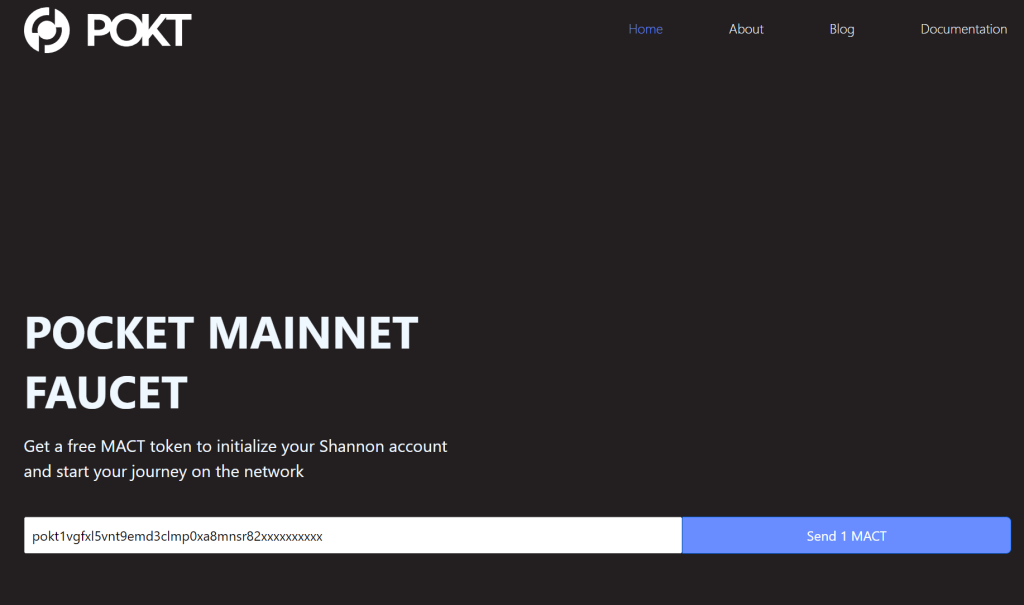
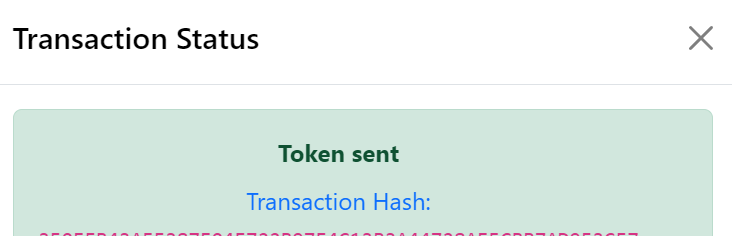
Head to the Shannon Mainnet Faucet at https://faucet.pocket.network/ and enter your new Shannon wallet address. You’ll see that it is a Cosmos based wallet because of the “pokt” prefix at the beginning. Click “Send 1 MACT”. You will see a processing message in the lower right hand corner, followed by a confirmation message when the mint is complete.
Congratulations! Your Shannon wallet is now ready for migration. You’ll see that you have no balance shown. You may now continue with the migration.
⚠️ Before You Continue with Migration:
It’s crucial to understand the prerequisites for migrating your Morse account. Please ensure the following conditions are met before you attempt to migrate:
- Your specific Morse account must be included in the official Morse-to-Shannon snapshot.
- This process is ONLY for wallet accounts. Node/Application accounts are not allowed to be migrated in this way.
- It must not have already been migrated in a previous attempt or process.
- Your corresponding Shannon account must already exist on the network. This will be accomplished by minting a MACT token using the Mainnet Faucet after the upgrade is complete.
By following these steps, you can successfully import your Morse account using Soothe Vault and prepare for the subsequent migration process on the Pocket Network. Always handle your private keys with extreme care and double-check all details during these procedures. Once all steps have been completed, you may click the “Migrate” button in the wallet, confirm both Morse and Shannon accounts are listed, and complete your claim.